
If you are serious about blogging, then setting up Google Authorship is an absolute must!
Don’t know what that is?
No sweat.
We got you covered.
When you go to Google to search whatever it is you are looking for, you may come across pictures next to the link.
Sorta like this…
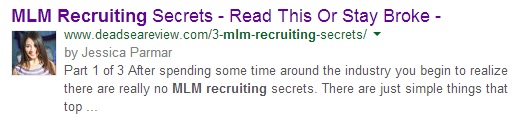
This just means that all your posts on your blog are now linked to your Google+ profile.
Why does that matter?
Google’s one and only job is to make sure that the information it provides at the top of every search is always going to be the best information with the most amount of quality.
Ultimately, linking your blog to your Google+ profile really just gives you an advantage and an extra edge in Google’s eyes.
Remember, we are courting Google and want to woo her over ;)
The internet is full of junky content out there and Google really has high standards!
Not only that – but there are so many affiliate marketers out there that try to cheat the system.
You know the types…
The Get Rich Quick types…
They are not welcome here.
One of the first “hacks” was just going bananas and completely stuffing your whole post with the keyword you were going after.
This is a Big No-No and can even hand you the ol Google Slap.
Then the lazy, moved on to the next hack… spamming their articles with links on links on links.
What happens with those fellas?
You guessed it…. Slapped!
Google has had to really crack the whip and scrutinize everything.
What the powers at Google are looking for is that you are doing a perfect balance of onpage and offpage SEO on GOOD, QUALITY content.
Authorship is another piece of confirmation that your content is quality because you’re putting you, your face, and your reputation on the line which shows a lot of cajones.
So now that you know WHY it’s so important, how the heck do you get it?
How To Set Up Google Authorship On Your Blog
Step 1 :: Your Google+ Profile
I briefly touched on this before, but if you haven’t already done so make sure you set up your Google+ Profile.
The more detailed you can be in filling out your profile, the better.
In some cases, this can really be your first exposure to a lot of prospects for your business.
Just like your Facebook profile, your Google+ profile gives a snippet of who you are, what you are about, and most importantly if they want to check out and hear what you have to say.
Whatever profile picture you select here is what will appear next to your posts…so choose wisely!
I definitely recommend a photo that shows your mug.
Step 2 :: Having Your Site To Match
The most important thing in this step is making sure that you “byline” matches EXACTLY with the name you set up with your Google+ profile.
Here’s an example…
If I put “Jess Parmar” in as my byline in Luxureus, but my Google+ profile said “Jessica Parmar”, guess what’s going to happen?
Nothing!
It won’t take.
If you are rocking the Thesis Theme, like we are, follow my lead.
Go to “Design Options” –> “Display Options” –> “Bylines” and click on the byline box.
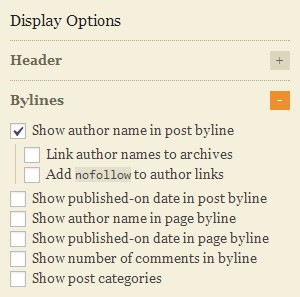
Got it?
Good!
Last step here we come.
Step 3 :: Your Domain E-mail Address
If you followed our steps clearly from the beginning, then you most likely have already taken care of this step.
But in case you haven’t … or didn’t listen….
(Oh, you rebel, you)
We’re going to want to make sure you do that now, something like admin@yourdomain.com…
Then you’re gonna wanna go ahead and click here.
Make sure you are signed in to your Google+ profile first.
Once you are, enter your e-mail address and click the blue button.
And just like that folks…
Other Helpful Tips
Having your gorgeous mug show up on your posts once you set up the authorship is NOT instantaneous and can take time.
It drives people nuts.
In fact, it drove us nuts too!
Authorship is then awarded in stages.
First you will see your By-line (i.e., By Jessica Parmar) next to your posts on Google.
Second you will see your By-line and how many Google+ Circles you are in.
Third, you will see all of the above AND your picture.
So want some tips to help with the progression?
- Continue to provide high quality content – stay away from keyword stuffing and write articles over 500 words that provide value to your audience.
- Be consistent about the frequency to which you are posting.
- Have a complete Google Plus profile.
- Make connections and add yourself to different Google Circles.
- Try adding “?rel=author” onto the end of your Google+ link on your site then check again using this testing tool.
Now that you have followed along with the set up steps and the helpful tips, all you can do is allow time to do it’s thing.
You can now start to analyze how Google Authorship has increased your click-through-rate!
Got questions, comments, or need any clarification on Google Authorship?
No problem!
Leave a comment below.
Here’s to seeing all of your gorgeous mugs around the internet!
Cheers,

Leave a Reply